Database 2.0
Now there’s a better and more efficient way to manage the member database! The improved database has many new features, including a customizable display, advanced search (query builder), an updated member profile view, and a more intuitive user experience. Below is a quick guide to accessing Database 2.0 with highlights of the features that PTA admins will find most helpful:
How to access and navigate Database 2.0
Access saved queries
Manage saved queries
More features in the navigation bar
How to access and navigate Database 2.0
- How to view a member’s profile
Access saved queries
Manage saved queries
- Set default query
More features in the navigation bar
- Choose and reorder columns
- Download Excel file
- History menu
- Tools menu
How to Access and Navigate Database 2.0
To access Database 2.0, an admin must first log in to the memberplanet admin portal, then select Members from the left navigation bar. The default view displays both active and inactive members, however, you can change the default view to display results of a saved query.
- On the left navigation bar, select Members
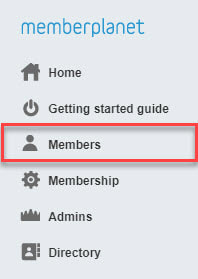
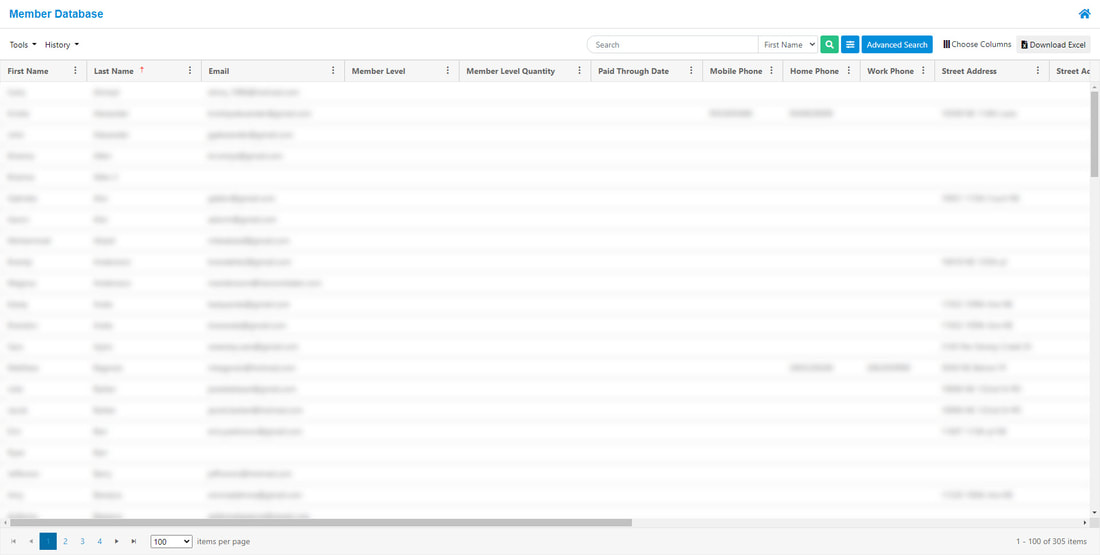
Your database will display both active and inactive members.
Sample:
Sample:
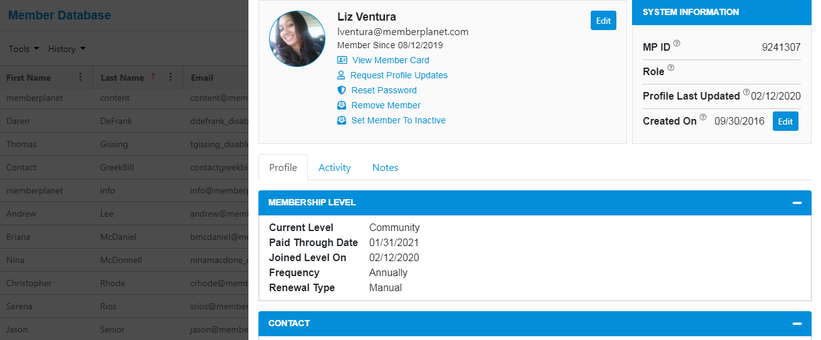
View a member’s profile by clicking on the row of the listing. A detail window will appear on the right-hand side of the screen. To exit the member profile page, click anywhere on the grayed-out portion of the database.
Basic Search Functionality
When using the basic search functionality on the page, the search criteria will default to First Name. If you intend to search by Last Name or Email, you will need to select the dropdown next to the search field to change the search criteria you are searching against.

Once you have entered your search value and selected the criteria under which you would like to start the search, select the green search button next to the bar.

Access Saved Queries
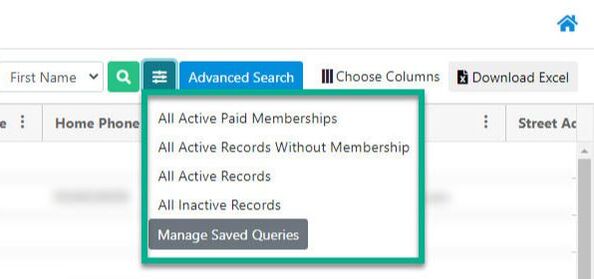
There are some saved queries that have been pre-populated for your PTA. In the top navigation bar, click the controls icon next to the magnifying glass, then select a saved query in the dropdown to run it.

2. Under the Positions tab, click Edit Positions
Manage Saved Queries
Admins have the option to edit saved queries, save as a new query, and set up or change a default query.
- In the top navigation bar, click the controls icon, then select Manage Saved Queries in the dropdown menu
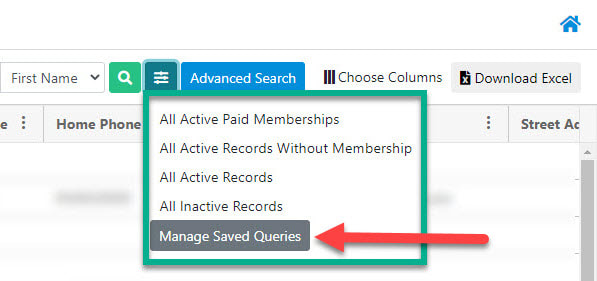
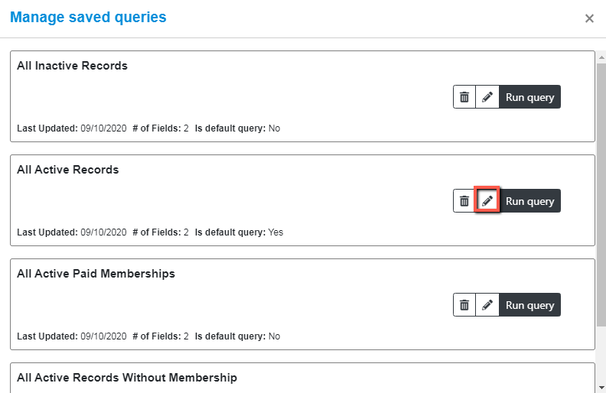
Your saved queries will be displayed along with options to delete or edit.
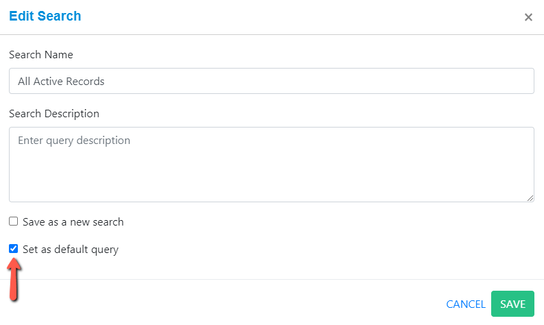
To select or change a default query, select the pencil icon to edit.
To select or change a default query, select the pencil icon to edit.
In the overlay that appears, select the checkbox next to Set as Default Query, then click Save.
After running a query, a callout bar will appear at the top with additional options:
Clear Search - returns admin to database view of all members
Edit Search - allows admin to select/deselect fields to rerun the query
Save and Save As - allows admin to save the advanced search for easy access later
Clear Search - returns admin to database view of all members
Edit Search - allows admin to select/deselect fields to rerun the query
Save and Save As - allows admin to save the advanced search for easy access later

How to Use Advanced Search / Build a Query
- In the top navigation bar, click the Advanced Search button

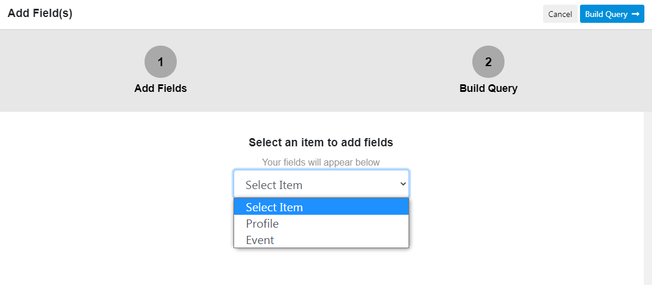
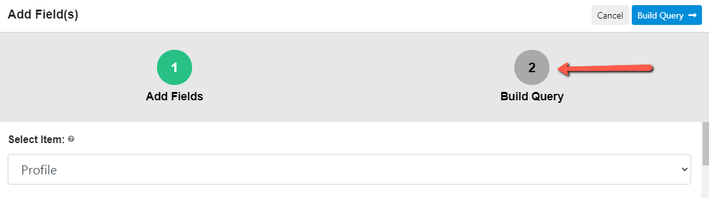
The Build Query detail page will display an item menu. (If you ran a query and didn’t clear it, you will be viewing the fields and conditions associated with the query.)
2. Complete 1: Add Fields by selecting the dropdown menu, then clicking either Profile or Events, whichever one is associated with the data you wish to search
Example: If you would like to search for members on a specific member level, you would select Profile.
Example: If you would like to search for members on a specific member level, you would select Profile.
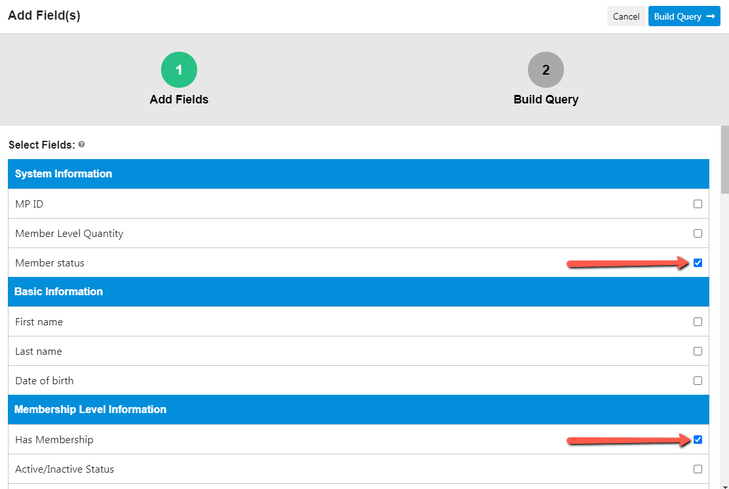
3. Select the fields you wish to query
Sample:
Sample:
4. When you have finished selecting fields, click 2: Build Query
The next screen will show advanced search options.
5. Select the conditions from the dropdown menus to refine your search
5. Select the conditions from the dropdown menus to refine your search
- You can also delete fields or go back to Step 1 by clicking 1: Add Fields.
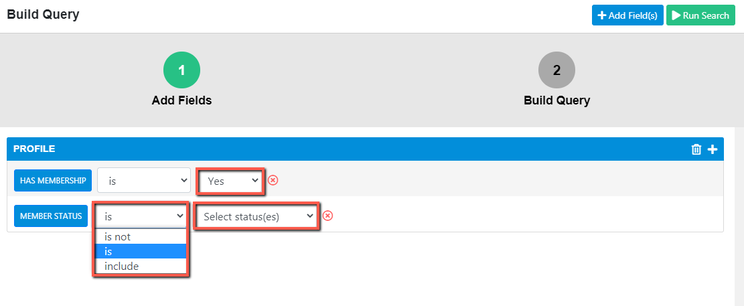
6. When you have finished building your query, click Run Search on the top right of the screen

Your query results will be displayed with the callout bar at the top with additional options:

More Features in the Navigation Bar
The top navigation menus contain new tools as well as the original database features.
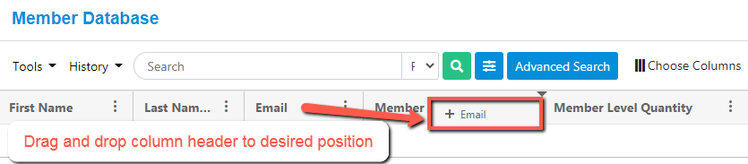
Choose and reorder columns:
Click the Choose Columns dropdown to select/deselect the columns you would like to be displayed. Columns can also be reordered by dragging and dropping the column header to the desired position.
Click the Choose Columns dropdown to select/deselect the columns you would like to be displayed. Columns can also be reordered by dragging and dropping the column header to the desired position.

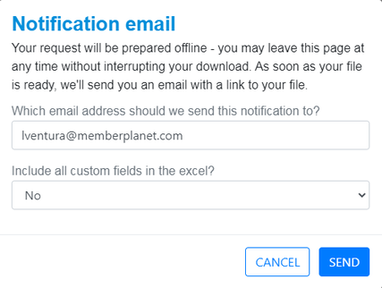
Download Excel file:
To download the query results as an Excel file, click Download Excel on the top right. In the overlay, enter the email address you wish to be notified at when the file is ready to download, then click Send. Once the file is ready, you will be emailed the link to download the file.
To download the query results as an Excel file, click Download Excel on the top right. In the overlay, enter the email address you wish to be notified at when the file is ready to download, then click Send. Once the file is ready, you will be emailed the link to download the file.

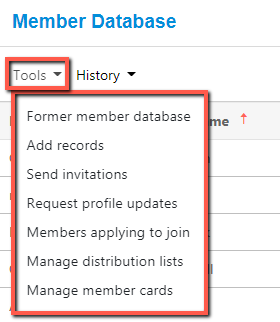
Tools menu:
Admins can navigate back to the former database as well as access primary database functions:
Former Member Database - brings user back to original database
Add Records - allows admins to add members or contacts
Send Invitations - lets admins email invitations to join the PTA
Request Profile Updates - send emails requesting that members update their respective profile
Members Applying to Join - if you have membership set up to let users apply to join your PTA, this displays a list of applicants
Manage Distribution Lists - create, view, and edit distribution lists (this does not include SmartLists)
Manage Member Cards - add a new member card, send member cards, and view card downloads
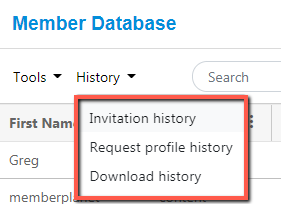
History menu:
The History menu contains tools that were included in the original database:
Invitation History - view the dates when admins sent invitations to join your PTA
Request Profile History - view the dates when admins sent profile request updates to members
Download History - view the dates when admins downloaded database reports

|
About memberplanet |
|


© 2020 memberplanet, LLC. ALL RIGHTS RESERVED.