How to create a list sign-up form
Your list sign-up forms let people sign up for your communication/mailing lists. The lists allow admins to know who would like to receive email updates about the group. Email lists can also be categorized by topic. For example, a local PTA may want to send general announcements, volunteer opportunities, newsletters, and blog updates. This feature allows individuals (whether members of your group or not) to sign up for email lists according to their preference.
This feature uses distribution lists to specify what lists people can sign up for. If you haven’t already, you’ll want to create distribution lists for your group to make it easier to not only send email updates, but also to give people the opportunity to sign up for them. Learn more: How to Create a Distribution List.
This feature uses distribution lists to specify what lists people can sign up for. If you haven’t already, you’ll want to create distribution lists for your group to make it easier to not only send email updates, but also to give people the opportunity to sign up for them. Learn more: How to Create a Distribution List.
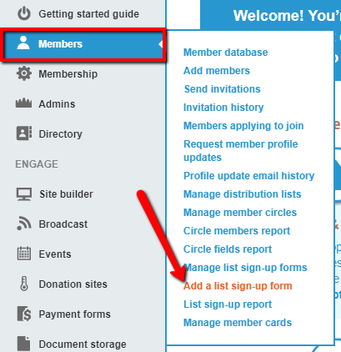
- Hover over Members in the left navigation bar, then click Add a List Sign-Up Form in the submenu
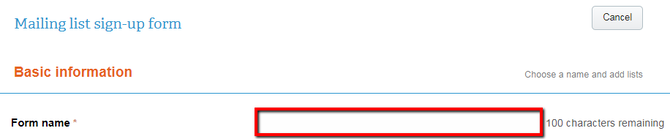
2. On the next page, give your form a name (Example: PTA Email Subscription)
3. Select Add next to the distribution list(s) you want to allow members/contacts to sign up for
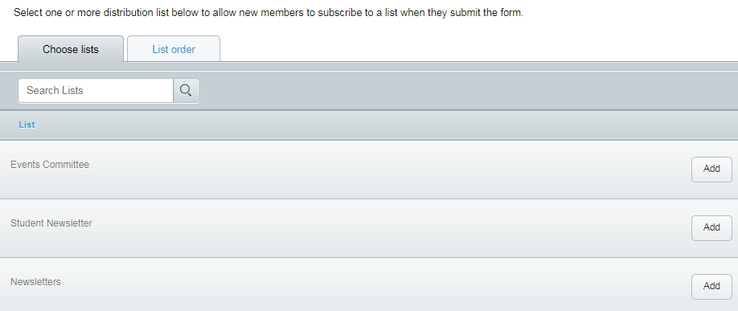
- If you want to change the order of the distribution lists, select the List Order tab and click the up and down arrows to change the positions of the lists.
5. Customize your page by selecting colors, adding a banner, and/or adding additional fields to your form
- Add custom fields by dragging and dropping your desired fields from the left-hand menu options in the Add Fields tab to the canvas area on the right

7. To publish your form, click Publish Now
Note: Those who choose to join your mailing list will not be added to the member database and will not have member accounts on memberplanet.
- To edit field options, select the field from the canvas or preview area, and the Field Options tab will appear on the left.
- You’ll be redirected to your form’s detail page where you can choose to preview or publish it.
7. To publish your form, click Publish Now
- A notification will appear to confirm it has been published. You can copy the link from here and post it on your website.
Note: Those who choose to join your mailing list will not be added to the member database and will not have member accounts on memberplanet.

|
About memberplanet |
|


© 2020 memberplanet, LLC. ALL RIGHTS RESERVED.