Create a distribution list
We know group leaders don’t communicate with all members or other admins in the same way. Sometimes you only want to send an email to a specific set of people. Distribution lists give you the option to send customized content to each subgroup or grouping of people you create. Creating distribution lists of those you most frequently communicate with also saves time on email or text message sends.
Note:
If you are a regional admin, you will have a pre-populated distribution list named Council Admins. It contains the council and local PTA/unit admins.
If you are a council admin, you will have a pre-populated distribution list named Unit Admins. It contains the local PTA/unit admins.
As a regional or council admin, you will only have permissions to access officer information; you will not be able to view or edit local PTA member data.
How to create a distribution list
How to view and edit a distribution list
How to use a distribution list
How to create a distribution list
To use a distribution list for an email or text message, you must first create one:
To use a distribution list for an email or text message, you must first create one:
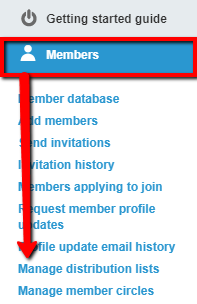
- On the left navigation sidebar, select Members
- In the submenu, click Manage Distribution Lists

3. Select Add a List button on the top right of the screen

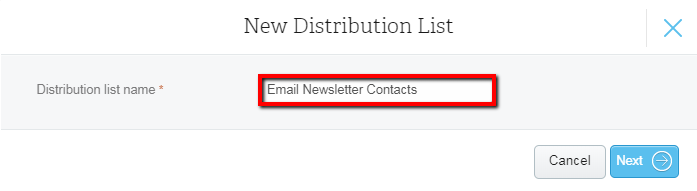
4. Title your list and click Next
5. Populate your list by checking the boxes beside the names you wish to add
There are three tabs to populate a distribution list:
There are three tabs to populate a distribution list:

Choose Recipients: Select current members and contacts.
Choose Lists: Use previously created lists to quickly select a batch of recipients.
Add New: Invite new members or add new contacts. (The system checks for duplicates and will not create duplicate profiles.)
6. Finalize by clicking Add Recipients or Add Members/Contacts
Choose Lists: Use previously created lists to quickly select a batch of recipients.
Add New: Invite new members or add new contacts. (The system checks for duplicates and will not create duplicate profiles.)
6. Finalize by clicking Add Recipients or Add Members/Contacts
How to view and edit a distribution list
- To view a distribution list, click Members on the left navigation bar
- Select Manage Distribution Lists in the submenu
- The distribution lists that you have created or are pre-populated will be displayed. You can utilize the search bar to locate the one you wish to view/edit.
4. Select View in the dropdown menu
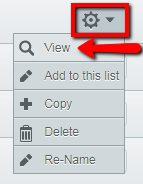
- The people on the distribution list will be displayed. From here, you have the option to delete recipients on the list and add more recipients.
To Delete People on the Distribution List
- Click the gear icon next to the person you wish to delete
- Select Delete in the dropdown menu
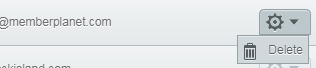
- The person will be deleted from the list.
To Add to the Distribution List
- At the top right of the screen, click the Add to this List button

There are three tabs to populate a distribution list:

Choose Recipients: Select current members and contacts.
Choose Lists: Use previously created lists to quickly select a batch of recipients.
Add New: Invite new members or add new contacts. (The system checks for duplicates and will not create duplicate profiles.)
2. Finalize by clicking Add Recipients or Add Members/Contacts
Choose Lists: Use previously created lists to quickly select a batch of recipients.
Add New: Invite new members or add new contacts. (The system checks for duplicates and will not create duplicate profiles.)
2. Finalize by clicking Add Recipients or Add Members/Contacts
How to use a distribution list
When you create any type of communication on the platform, you will have the option to choose a distribution list when selecting recipients. Types of communication where you can select a distribution list:
Email
Broadcast text message and/or email
Event guest list
Donation notification list
Survey
Payment form notification list
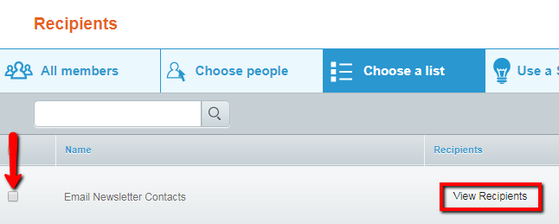
Follow the instructions on creating the communication, then in the recipients options or Notify Your Members option, select Choose List. The distribution lists you have will be displayed. From there, you can view recipients within a distribution list and select the list(s) you wish to use.
Example of an email:
When you create any type of communication on the platform, you will have the option to choose a distribution list when selecting recipients. Types of communication where you can select a distribution list:
Broadcast text message and/or email
Event guest list
Donation notification list
Survey
Payment form notification list
Follow the instructions on creating the communication, then in the recipients options or Notify Your Members option, select Choose List. The distribution lists you have will be displayed. From there, you can view recipients within a distribution list and select the list(s) you wish to use.
Example of an email:

Click the Save & Close button to confirm your selection.

|
About memberplanet |
|


© 2020 memberplanet, LLC. ALL RIGHTS RESERVED.